Tuesday, July 19, 2011

Familar Food: Making Pizza

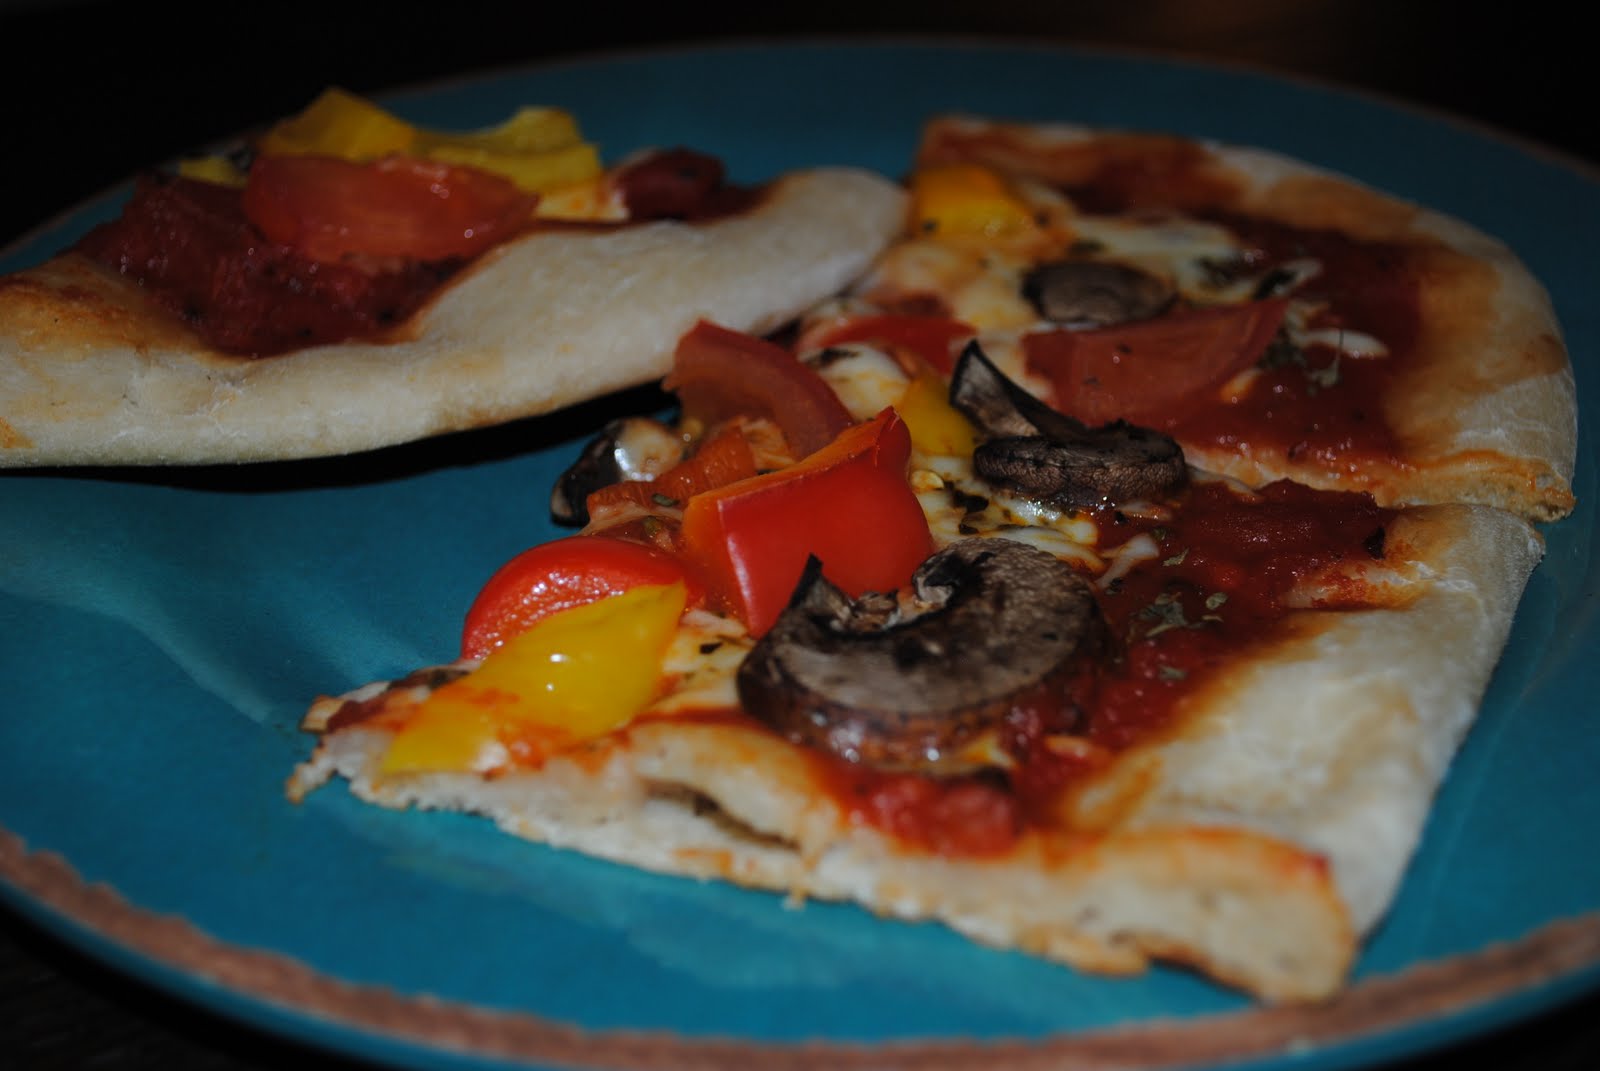
Pizza is a Friday night tradition at home. Even though the pizza selection in Westborough, MA is quite limited, I always looked forward to this ritual as the true beginning of the weekend. As I grew up and my palette matured, I started to realize that pizza in Westborough really is not good. At all. To keep up with our Friday ritual without sacrificing taste, I started to make pizzas for my family. The best part about this was that I could easily customize our pizzas to fit the varied (and limited) taste buds of everyone--peppers and mushrooms for me, broccoli and ricotta for mom, plain ol' cheese for Emma. Pizza Fridays made for a stress-free, yet tasty (and much better than Papa Gino's) kick-off to the weekend.

Now that I no longer live at home, Emma has taken on the role of pizza-master. While both delicious, we each have our signature pies (mine has a crispier crust; Emma's a little softer). But just because I live in Pizza Paradise, also known as New York City, doesn't mean I can't carry on the family tradition here.

Luckily, homemade pizza is a cheap and easy solution to cooking with friends. Everyone can chip in with favorite toppings, and everyone can take on a task: rolling out the dough, chopping the veggies, sprinkling the cheese. It's a fun and nostalgic way to get those friends in the kitchen who don't usually cook for themselves. So that's just what me and a few of my friends did this Monday night. Albeit, it wasn't a Friday night and it wasn't with my family, but sharing laughs and good food with friends made the next 4 days until Friday seem just a little less threatening.

Veggin' it up!

Teamwork

Classic cheese pizza with fresh tomatoes, red and yellow peppers, and mushrooms

Feta cheese and pesto pizza with sliced tomatoes and mushrooms--the favorite!

Tuesday, July 12, 2011

You Grill, Girl!

Who ever said that girls can't grill? My women's studies classes in college taught me well that gender is not defined by biology, but by the societal and structural demands and expectations placed on the so-called genders. As a feminist who loves a good burger, you better believe no societal expectations were getting in the way of me learning how to man the grill.

I have to admit, it was a little scary the first time my dad taught me how to light it. It probably didn't help that my mom was fretting through the window, waiting for the flames to blow up in my face. Like any cooking technique, it's taken me some time to figure out all of its intricacies--how hot to heat it up, or how to know when your burger is done. But there are a few female-gendered qualities that just might be a little more helpful on the grill. (Boys, listen up. Take a lesson from these qualities not only at the grill, but also in real life...)

1. Patience is extremely important on the grill. Flipping your burgers over and over again won't make them cook any faster. Let the meat/veggies/etc sit for a good few minutes to get that nice char on one side before flipping.

2. Be gentle with your food, especially burgers and fish. Pressing the burgers into the grill only causes all the tasty juices to drip out. Make sure the grill is lightly oiled or sprayed before placing fish on the grate--if it sticks, it will crumble apart when you try to move it.

3. Organization A little planning can get you a long way in the kitchen, whether cooking inside or out. Before you throw all your food on the grill at once, make sure you know the cooking times for each item. Also, the more you crowd the grill, the longer everything will take to cook. Keep food evenly spaced for accurate cooking times.

So go forth women, and show that grill what you're made of!

Grilled Vegetable Skewers
Makes 6-7 skewers


Ingredients:
1 pint cherry tomatoes
1 summer squash
1 zucchini
1 tbs finely chopped fresh rosemary
1 tbs finely chopped fresh thyme
1 garlic clove, minced
1 tsp kosher salt
1/2 tsp black pepper
1/4 cup balsamic vinegar
1/3 cup olive oil

1. Cut the squash and zucchini into 3/4-inch cubes, so they're about the same time as the cherry tomatoes. Place in a boll with tomatoes.
2. In a small bowl, whisk together balsamic vinegar, olive oil, herbs, garlic, salt and pepper. Pour the marinade over the vegetables and stir to coat. Refrigerate for 20 minutes to allow the vegetables to absorb the flavors.
3. Assemble the skewers as desired.
4. Over a medium grill that's been lightly brushed with olive oil or sprayed with cooking spray, place the skewers so they run perpendicular to the grate. Flip every 2-3 minutes, so that all sides are nicely charred and cooked through.
Cheddar burgers and vegetable skewers

Grilled sweet potato fries

S'mores! (these were deceivingly not prepared on the grill)

Wednesday, June 29, 2011

Detox Dinner: Grilled Chicken, Asparagus & Portobello Mushroom

After a long weekend in Las Vegas filled with food court breakfasts, all-you-can-eat buffets and "frozen yard" Mai Tais, I was in major need of some fresh, light food and a heavy dose of exercise. Don't get me wrong, the frozen drinks were much needed in the 105 degree sun and we did eat some delicious food (i.e. Border Grill where I enjoyed amazing fish tacos). But after three days of indulgence, I was more than ready for a healthy detox.

Not a crazy-starve-yourself detox, but rather eating whole foods with simple and healthy ingredients. After a quick trip to Trader Joe's to restock my fridge, I decided to make this super easy dinner with just three main ingredients: portobello mushrooms, asparagus and chicken breast tenders. The marinade is so refreshing and flavorful that you don't need to add extra fat or carbs to beef up the meal. Plus, the meatiness of the mushrooms adds a deceiving richness to the dish. The recipe below makes two servings--perfect leftovers for lunch or dinner to continue the "detox" throughout the week.

So while Las Vegas was definitely a welcome escape from reality, it was about time to swap my dancin' shoes for sneakers, and endless buffet brunch for good ol' Kashi cereal. But healthy, delicious meals--like this one-can make the transition back to the real world just a little more tasteful.

Grilled Portobello, Asparagus & Chicken
Makes 2 servings


Ingredients:
4 chicken breast tenderloins
12-14 asparagus spears
2-3 portobello mushrooms
1 tbsp olive oil (to drizzle the chicken)
3 tbsp freshly grated Parmesan cheese

For the marinade:
2 garlic cloves, minced
1 tsp Dijon mustard
1 tsp honey
2-3 tbsp lemon juice, or juice of one lemon
1/4 cup extra virgin olive oil
1/2 tsp dried thyme
1/2 tsp dried rosemary
1/2 tsp salt
1/4 tsp freshly ground black pepper

1. Whisk all ingredients for the marinade in a small bowl.
2. Add the mushrooms and asparagus to a bowl or ziploc bag. Pour most of the marinade over the vegetables and let sit in the refrigerator for 20-30 minutes before cooking. Reserve the rest of the marinade for later.
3. Spray a grill pan with cooking spray and heat over medium heat. (If you don't have a grill pan, just saute in a regular pan).
4. Season both sides of the chicken with salt & pepper, and drizzle with a little olive oil. Place the chicken tenders on the grill, and allow to cook about 3-4 minutes each side. The chicken should have a nice golden crust. Once the chicken is cooked through, remove and set aside.
5. Add the mushrooms and asparagus to the grill pan. Cook until tender, flipping the mushrooms and asparagus after about 3-4 minutes.
6. Plate the chicken, mushrooms and asparagus, pouring the leftover marinade on top. Top with freshly grated Parmesan cheese for an extra salty punch.

Tuesday, June 21, 2011

Cooking is a Gas

Ah, the joys of cooking in a New York City kitchen. Minimal storage, little counter space, doll-sized ovens. Not to mention bad air circulation (my smoke alarm goes off as soon as I start to boil water). For someone who loves kitchen appliances and spreading out as I cook, this has been quite an adjustment. But cooking in my tiny kitchen has taught me to be nimble and flexible. Go with the flow and see what happens, even if it's not according to the recipe. Well, a recent meal mishap ended in a delicious discovery...

Soon after moving into my apartment in November, I returned home around 10 at night after a food writing class. I walked in and instantly noticed the smell of gas throughout my apartment (okay well in the closet that is my apartment). Freaking out, I called my mom. This of course didn't help at all--she's at home in Massachusetts, so what was she going to do about my oven? The smart thing to do would have been to call my super, which I eventually did. He told me the pilot light had gone out and simply relit it. Well up until a couple weeks ago, my pilot light had been going out on a recurring basis. According to my super this is "no big deal", but it got to the point where I actually woke up in the middle of the night to the smell of gas. And my mom, being an even bigger worrier than me, would frequently send me emails at 7 am with the subject line: "RESPOND ASAP - R U ALIVE??" Yes, really. So enough was enough. I finally badgered asked my super to replace the stove. Although it's about half the size of my old stove, it's much cleaner and about 40 years newer.

Believe it or not, tonight was the first time I attempted to use the broiler on my new stove. To be fair, I'm fairly new to gas stoves (if that wasn't already evident through my gas-smelling freak out)--we always had electric at home. Anyways, tonight I set out to make a frittata from one of my favorite blogs Big Girls Small Kitchen, which requires that you set the eggs under the broiler for a few minutes to finish cooking. Halfway through sautéing the veggies I realized I don't even know where the broiler is on my new stove, so I of course called my mom. This was not a good idea. Not because she didn't know either (which she didn't), but because as I was talking on the phone, the eggs had already fully cooked on the stove top that it was point of frittata. Oops.

I think the consistency of my eggs also contributed to this little mishap turned delicious. The original recipe calls for 4 eggs and 2 egg whites. I only had 4 eggs, so figured I'd wing it. I guess those 2 egg whites really do make the difference. In any case, the frittata turned into more of a an egg scramble, while not intentional, wound up being delicious. So I guess that's the beauty of my lethal gas-leaking New York City kitchen: my own original (albeit impromptu) recipes.

Gas Leak Egg Scramble
Serves 1 hungry individual, or 2 lighter portions


4 whole eggs
1/4 tsp salt
Freshly ground black pepper
2 tbs olive oil
2 garlic cloves, minced
1/4 cup sun-dried tomatoes
1/2 cup broccoli florets
1/3 cup grated Parmesan cheese

1. Beat eggs with salt and pepper. Set aside.
2. Heat olive oil over medium heat. Add garlic and saute until fragrant, about 1 minute. Add sun-dried tomatoes and broccoli. Cook until broccoli is tender, about 5-6 minutes.
3. Add the eggs to the pan. With a nonstick spatula, immediately start to pull the eggs to the center, forming curds. Just before all the egg is cooked, top with Parmesan cheese and stir throughout. Serve immediately as a dinner for one, or on top of toast for 2.

Tuesday, June 14, 2011

Heat of the Moment

I've been on a real improv kick in the kitchen lately. Not planning out my meals the weekend ahead like I usually do, but cooking whatever I'm in the mood for. This is very atypical for me. I'm a Type A planner to a "T"--on Sundays I'll sift through cookbooks and favorite blogs for recipe ideas, then decide what I'll make for lunch and dinner for the week and make my weekly trip to Trader Joe's to buy all the ingredients. I usually take comfort in this routine, knowing what to expect throughout the busy week.

But as in life, menus don't always go as planned--you run out of eggs, the bread has gone stale, you burn the rice. These mishaps are part of the challenge (and fun!) with cooking. The more comfortable you become, the more agile you'll be in working with unpredictability.

So I'm not quite sure what's inspired my recent change in fooditude (food + attitude, cute huh?). I think the 90 degree days in NYC definitely have to do with it--the thought of slaving away over an intensive meal in my hot, cramped kitchen is not appealing. Or maybe it's been some recent changes in my personal life that have shown me you can never get too comfortable with routine, because you never know when you'll burn the rice. Regardless of the reason, I'm enjoying the liberation of my newfound fooditude.

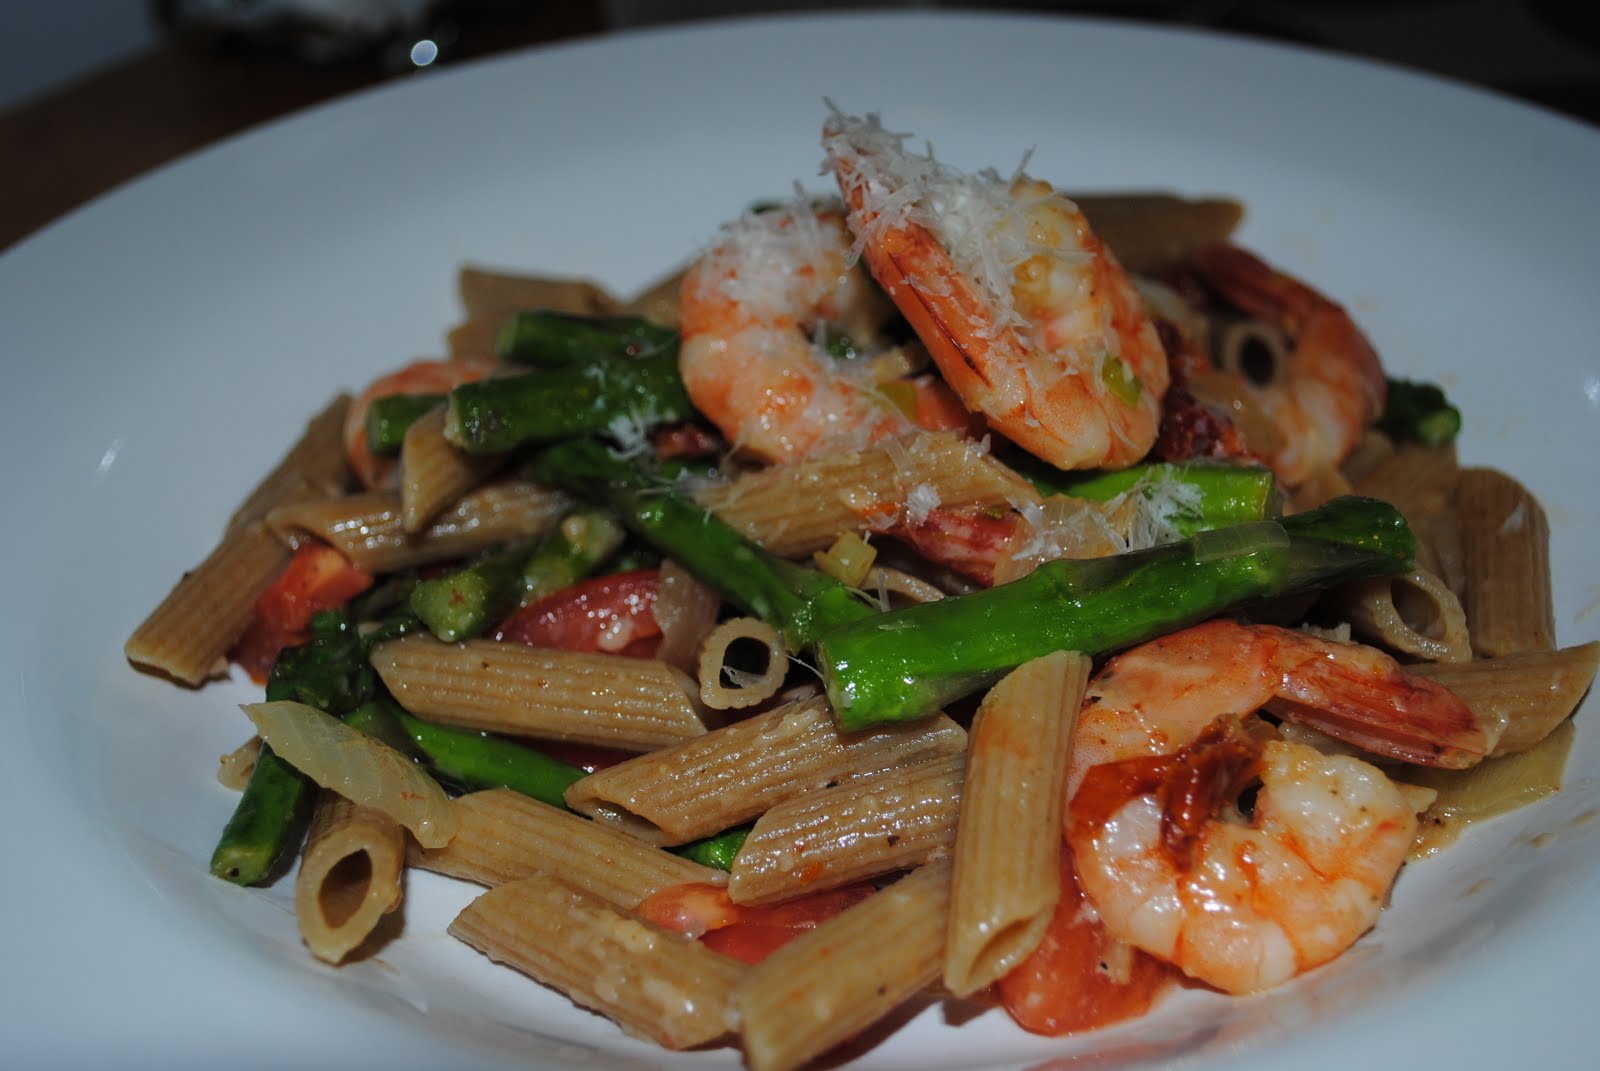
On a recent weeknight I came home craving a summery, Mediterranean pasta to find only asparagus in my fridge. What to do, what to do? My new footitude and I set to work looking through my pantry for inspiration...sun-dried tomatoes, whole wheat pasta, and frozen shrimp in the freezer. Perfecto! In less than 30 minutes I was able to cure my summer pasta craving.

Not only was this meal quick and easy to prepare, but all the more fun and exciting because it was my own. Sure, it's nothing fancy and has probably been done before, but not following a recipe is such a liberating and exhilarating feeling. You never know what you're gonna get; it's just you and your taste buds to guide you. Going into the world (er, kitchen) alone and unguided can be intimidating at first, but you'll always be surprised with what you can overcome--I mean cook--in the end.


Improv Shrimp Pasta
Makes 2 servings (great for lunch the next day)

1 1/2 cups whole wheat penne
2 tbs olive oil, divided
3 tbs onion, chopped
1 garlic clove, minced
1/2 bunch asparagus, cut into 1 1/2 inch pieces
1/4 cup sun-dried tomatoes
7-8 frozen shrimp, thawed
1 small Roma tomato, chopped (this isn't necessary, but helps to add a little moisture to the sauce)
1/4 cup freshly grated Parmesan cheese, plus more for garnish
salt and pepper to taste

1. Start by bringing a pot of water to a boil. Add a couple tablespoons of salt then stir in the pasta. Cook until al dente.
2. Meanwhile, heat 1 tablespoon of the oil over medium heat. Add the onion and garlic. Sauté 2-3 minutes until fragrant and onion starts to become translucent.
3. Add the remaining olive oil to the pan and add the asparagus. Season with salt and pepper. Stir and let that cook for 3-4 minutes more.
4. Add the sun-dried tomatoes until they're slightly moistened, about 2 minutes. Add the shrimp and tomatoes. Season with a little more salt and pepper. Stir to combine and let cook for 3 minutes, so the shrimp heats through and flavors combine.
5. Toss shrimp and vegetables in a large bowl with the cooked pasta. Stir in Parmesan cheese. Spoon onto 2 plates, or reserve some for leftovers. Garnish with more Parmesan cheese if desired.

Monday, June 6, 2011

Rockin' Moroccan

Some people sing in the shower. I sing while I cook. When I was younger, my mom would belt it to John Denver and Carly Simon in the kitchen as she prepared dinner (actually she still does this--sorry mom!). Now I've carried on this dinnertime ritual in my own kitchen. Whilel John Denver does not frequent my playlists, Carly Simon's "You're So Vain" has made the cut a few times. Like mother, like daughter.

So while I crooned along with Adele's "Rolling in the Deep" as I prepared this Moroccan couscous, I thought this blog post would be the perfect chance to discuss my love for food and music, if not for the sole reason that I could use a rhyming title--Rockin' Moroccan ;)

My passion to perform began well before my taste buds started to develop--I used to sing and tap dance to the songs from "Annie", wearing her costume that my mom made me. My younger sister, Emma, always got stuck playing Molly--the other orphan without any solos and an ugly, raggedy dress. Seniority rules.

Someone was always singing or dancing around the house when we were growing up. Mom and her John Denver, me and Annie, Michael and the Sailor Moon soundtrack (sorry again!). So it was only natural that I wanted to be a Broadway star when I grew up.

Well college happened, reality happened, and clearly that dream has yet to come to fruition. But as I fell out of singing in college, I found food--good food. Being at NYU for a year opened my eyes (or mouth) to a whole world of tastes, smells and cultures; and my hunger to learn and try more only continues to grow now (pun intended).

Now a year out of college and still not sure what I want to do with my life, I do know that food and music will always be a part of it--whether that's singing alone in my apartment while stirring pasta, or someday having my own singing/dancing/cooking spectacular on the Food Network.

Rockin' Moroccan Couscous
Makes 3-4 servings

Ingredients:
3/4 lb cooked chicken breast, cut into pieces
1 tbs olive oil
1/2 cup onion, chopped
1 cup chicken broth
1 cup dried couscous
3/4 tsp curry powder
1/2 tsp ground cinnamon
1/2 tsp salt
1/4 dried cherries
3 tbs toasted pine nuts
2-3 scallions, white and some green parts, sliced

1. Heat olive oil in a large pot over medium high heat. Add onion and sauté until slightly translucent, about 5-6 minutes.
2. Add chicken broth and bring to a boil. Remove from heat and add couscous, curry, cinnamon, salt and dried cherries. Cover and let sit for 10 minutes. Uncover and flake with a fork to keep the couscous fluffy (do not stir--this will make the couscous stick together in lumps)
3. Add chicken, pine nuts and scallions. Stir to combine. Can be served hot or cold. Would be a great side dish for summer barbecues and parties!

Tuesday, May 31, 2011

Better than Takeout: Homemade Fried Rice

This past weekend was full of delicious food. From lobster rolls to burgers, guacamole and apple pie, it was a traditional Memorial Day feast. But one of the more unexpected dishes consumed in my gluttony this weekend was my friend's mom's fried rice. Many times I've heard about her rice; but never before had I tried...until now.

The fried rice was served as a side dish to a beautiful Chicken Marbella (recipe from the Silver Palate), but the rice easily caught my attention as the star. I literally could not wait to come back and make this on my own. I was too anxious to wait for her recipe that I went ahead and developed my own.

She explained the basic gist of it: sauté the veggies, add the cooked rice, drop in an egg, and voila! I cannot tell you how easy this recipe is, you just need to try it for yourself. The most time-consuming part is waiting for the rice to cook (but if you buy the pre-cooked rice from Trader Joes like I did, this will only take a minute in the microwave!) From start to finish this dish only took me 15 minutes to make--no doubt less time than it takes to order and wait for takeout delivery, not to mention a whole lot cheaper!

Knowing that I already had frozen corn and peas on hand, I decided to add some red pepper to the mix to keep with the bright colors, but you could use whatever vegetables desired--mushrooms, broccoli, shredded carrots. The egg gives that sticky texture to the rice that is so familiar in Chinese takeout, but without the extra grease and fat. This recipe makes about four servings, but I could not help myself from going back for seconds, it was that good. And just like takeout, this fried rice will taste even better as leftovers for lunch, dinner, even breakfast ;)

Fried Rice
Serving Suggestion: Serve with sautéed chicken, shrimp or tofu for a rounded meal

Ingredients:
2 cups cooked brown rice
2-3 tbs canola or vegetable oil
1/2 cup onion, chopped
1 garlic clove, minced
1 red pepper, chopped
2/3 cup frozen peas, thawed
2/3 cup frozen corn, thawed
1 egg, beaten
2 tablespoons soy sauce, or more to taste

1. Coat the bottom of a large pot with 1-2 tablespoons canola oil over medium heat. Add onions and garlic. Sauté until fragrant and translucent, about 5-7 minutes.
2. Add red pepper, peas and corn (or other desired vegetables). Sauté until slightly softened, about 5-7 minutes. Remove veggies from pot and set aside.
3. Add another tablespoon of oil to the same pot. Add the cooked rice and stir to coat with the oil. Continue to stir the rice until it is glistening and starts to brown slightly, about 5 minutes.
4. Add the egg into the rice and stir immediately to distribute evenly throughout the rice.
5. Return the veggies to the pot and add a couple tablespoons of soy sauce. Stir to combine. Serve warm or cold.