Sunday, October 9, 2011

A Belieber in Pumpkin

I'm going to let you in on a little secret. I'm having a love affair...

With pumpkin! I've had a pumpkin fetish ever since the pumpkin spice latte was introduced at Starbucks years ago. I do think the pumpkin craze is a bit much now, a little too mainstream. But I'd like to think I was one of the original pumpkin enthusiasts, before it became so in vogue.

But so what if pumpkin is more of a "rom-com" than an edgy, indie flick. I've always preferred my movies cheesy and my music poppy. Maybe pumpkin is the Justin Bieber of food right now, but that's not going to stop my obsession (with pumpkin I mean, although I do have quite the case of Bieber Fever). Knock it all you want, but it's darn good, and you can't deny that you don't love it too (again, I'm talking about pumpkin here, but also applies to the Biebs).

We all love pumpkin for its sweet, nutty flavor; but the reason it's such a beloved ingredient is for what it represents: family traditions, holidays, gathering together with loved ones. Surprisingly pumpkin pie was never a staple at our Thanksgiving table, but the symbol of what it represents makes me nostalgic for holidays past as a kid.

While I love your standard pumpkin dishes - pumpkin pie, pumpkin bread - I'm interested in using it in new and expected ways. So when I came across this recipe from Serious Eats for pumpkin turkey chili, I just had to try it. Pumpkin and chili, how much more autumn and hearty can you get? It seemed like the perfect combination...and trust me, it was! The pumpkin flavor was very subtle, but added a nice warmth and spice to the chili. It was the perfect one-pot meal to make on a lazy Sunday afternoon. This pumpkin turkey chili gave a more hipster edge to an otherwise Bieber-esque ingredient.

Pumpkin Turkey Chili
Makes 5-6  servings


Ingredients:
1 tbs vegetable oil
1 cup chopped onion
1/2 red bell pepper, chopped
1/2 yellow bell pepper, chopped
1 can (4 oz) chopped green chiles
1 garlic clove, minced
1 lb ground turkey
1 can (14.5 oz) diced tomatoes
1 can (14.5 oz) red kidney beans
1 can (14.5 oz) pumpkin puree
1 1/2 tbs chili powder
1/2 tbs cumin
3/4 tsp salt
1/2 tsp black pepper
Cayenne pepper to taste (about 3-4 shakes)
1/4 fresh cilantro, chopped
Shredded cheddar cheese

1. Heat oil in large pot over medium heat.
2. Saute onion, pepper, green chiles and garlic until tender - about 10 minutes.
3. Make room in the center of the pot. Add the turkey and brown, breaking up with the back of a spoon.
4. Stir in tomatoes, beans and pumpkin. Add chili powder, cumin, cayenne, salt and pepper.
5. Reduce heat and simmer at least 20 minutes. Stir in fresh cilantro. Serve with shredded cheddar cheese.

The perfect workweek lunch - healthy, hearty and delicious!

Monday, September 26, 2011

Sweating for Soup

The weather in New York City just doesn't want to change. I still can't walk outside without getting an attractive little sweat stain on my back, and my electric bill continues to grow as I pump the AC.

Hello Fall, you were supposed to start on Friday. Where are you?!? Okay, fine. You're not ready to show yet, but I will do everything in my power to tempt you out. Starting with delicious food.

So on this lovely, muggy Sunday afternoon I decided it would be the perfect time to make a big, steaming pot of soup. Yes, I was literally sweating over my stove and had to air myself out every 5 minutes by standing in front of my AC, but the end result was totally worth the steam sauna.

I intended to make cauliflower parsnip soup - yet another recipe from my favorite blog Big Girls Small Kitchen - but when Trader Joe's didn't have parsnips, I decided to take my own spin on it and do a cauliflower carrot ginger soup. It was super simple and made my apartment smell so warm and slightly sweet from the carrots and ginger. And the best part is now I have a delicious, healthy lunch for the whole week, and it only took one pot, about 40 minutes, and lil-bit-a sweat.

Fine, Fall. Be stubborn. But even if you refuse to come, I can at least eat like you are here.

Cauliflower Carrot Ginger Soup
Makes 6-8 servings


2 tbs olive oil
1 medium yellow onion, chopped
1 head cauliflower, chopped
1 lb carrots, peeled and chopped
1 1/2 tsp ground ginger
7-8 fresh thyme sprigs
8 cups vegetable stock
Salt and pepper to taste

1. Heat oil in a large pot over medium heat. Add the onion, cover, and cook until translucent - about 8 minutes.
2. Add cauliflower, carrots, ginger, thyme, vegetable stock, salt and pepper. Stir and bring to a boil, then reduce heat and let simmer for 30 minutes.
3. Remove the thyme stems and season with salt and pepper if needed.
4. Purée the soup with an immersion blender or food processor, until mostly smooth but still somewhat chunky. Garnish with fresh thyme.

Soup simmering away...Me sweating away

This soup just looks like fall

Wednesday, September 21, 2011

Dining With The Stars

I’ve always loved to watch awards shows to ogle at the fashion and dream about what my life could have been if I ever pursued my dreams to become the next orphan Annie on Broadway at a young age. I may have missed the boat to become the next Lea Michele, and I can barely afford my rent, let alone expensive designer dresses (although my New York City rent is probably comparable to some of those price tags), but at least I can cook and can dine like one of the stars at these awards shows. In fact, I probably have the better deal here: I can enjoy delicious food from the comfort of my sweatpants and couch, while these celebs have probably starved themselves for weeks to be sewn into those size triple-zero dresses. When you look at it from a food perspective, being poor and  not famous doesn’t sound so bad after all…

Anyways, this year’s Emmy’s served as another great excuse to indulge and pop open the zipper on my pants (take that Lea Michele!). In keeping with the elegance of the Emmy’s, Elana and I decided to make some dainty finger foods from one of our favorite blogs (and now a cookbook!) Big Girls Small Kitchen. I discovered Big Girls Small Kitchen (BGSK) a couple years ago during an episode of The Barefoot Contessa. I was easily hooked by their “cooking for the quarter-lifer” spiel and delicious, yet simple recipes. I’ve been religiously following BGSK ever since, and even had the chance to contribute to their blog!

BGSK is all about cooking and entertaining on a budget within the confines of a teeny NYC kitchen, so we knew these Sweet Pea Crostini and Caramelized Onion Tartlets would be perfect for us broke quasi-New Yorkers. Both of these small bites were super easy, but also tres chic. My days of becoming a Broadway sensation may be behind me, but I can certainly take center stage when it comes to eating like one.

Sweet Pea Crostini

Caramelized Onion Tartlettes

Sweet Pea Crostini
Makes 15-25 bites


Ingredients:
1 tbs butter or olive oil
1/2 yellow onion, diced
Pinch of red pepper flakes
20-ounce bag of frozen peas
1/4 white wine or water
1 tsp salt
1 baguette, cut into 1/2-inch-think rounds
1/4 fresh mint leaves
1/4 cup grated Parmesan cheese

1. Melt the butter or heat the oil over medium-low heat. Add the onion and red pepper flakes, and saute until onions are translucent, 5-10 minutes.
2. Preheat the broiler.
3. Arrange baguette pieces on cookie sheets and toast under the broiler until lightly toasted.
4. Add peas and white wine to the onion mixture, raise heat to medium-high. Bring the liquid to a boil, stirring the peas until they defrost, 5-7 minutes.
5. Add the mixture to a food processor and add the salt and a few mint leaves. Blend until the peas are similar to the consistency of hummus.
6. Scoop a tablespoon of the pea mixture onto each toasted baguette round and garnish with chopped basil and grated Parmesan.

Caramelized Onion Tartlettes
Makes 15 tartlettes


Ingredients:
1 sheet frozen puff pastry, thawed
Olive oil
1 large onion
1/4 tsp ground cumin
1/4 tsp paprika
1/4 tsp chili powder
Dash of cayenne pepper
Salt, to taste

1. Coat a skillet with olive oil and saute onions over medium heat, stirring infrequently. Once they soften and begin to brown, reduce heat to low and allow onions to caramelize, about 30 minutes. When the onions are dark brown, add the spices and salt to taste.
2. Meanwhile, using a round cookie cutter or the top of a glass, cut the puff pasty into several small round circles, about 15.
3. Top the pasty rounds with the onions and bake in the oven according to the directions on the puff pastry package. Pastry should be slightly golden and crisp. Serve immediately. 

Wednesday, September 7, 2011

Falling for Autumn

This summer has flown by at lightning speed. It’s been over a month since my last blog post, and yet it feels like it was only Memorial Day a week ago. Unfortunately, I think the summers will only get shorter as my years as an “adult” progress. I’m kicking myself now, wishing I soaked up every last second of freedom last summer rather than stressing out about finding a job.

As sad as it is to see summer go, I always look forward to this time of year—apple picking, sweater weather, and pumpkin everything! For me, the fall is a time of comforting traditions spent with friends and family, and a welcome change of pace after a summer on-the-go…So the recent dreary and cooler weather in NYC was the perfect opportunity to make something warm and wholesome for dinner.

Sloshing through the puddles on my way home from work, I had this craving for a curry dish. Now don’t be fooled—curry was never a tradition in my home. I don’t know that curry has ever set foot in my family’s home, but something about the rich spices and the deep orange color of curry just has “autumn” and “comfort” written all over it. Luckily, this recipe is so simple that I already had all the ingredients and didn’t have to trek back out in the rain to the grocery store. I served the curry sauce with shrimp over brown rice, but it would also be great over chicken or vegetables. The curry perfumed my whole apartment with this spicy, almost cinnamony smell, and had a rich, creamy texture that I just crave in fall foods. Not having a true summer vacation anymore is definitely a bummer, but it’s these hearty, comforting meals that I look forward to all year round.

Easy Curry with Shrimp and Brown Rice (served with roasted baby zucchini, pictured below)
Serves One

Ingredients:
1 tbs butter
2 tbs honey
1 tbs Dijon mustard
1 tsp curry powder
Dash of nutmeg
Dash of salt
6-7 cooked shrimp (I just thawed some frozen shrimp in my freezer)
1 cup cooked brown rice

1. In a small saucepan, combine the butter, honey, mustard and spices over medium heat. Whisk until the butter is melted and everything is combined even.
2. Add the cooked shrimp to the sauce, allowing them to absorb the flavors and warm through—about 4 minutes.
3. Pour the shrimp and sauce over prepared brown rice and serve warm.


Tuesday, August 2, 2011

Becoming Ina

As my siblings and I have gotten older, and with my growing interest in food over the years, our family vacations have become more and more revolved around food. Sure, we like to occupy ourselves with other activities--bike rides, swimming, tennis--but really, these activities just fill in the gaps between meals. (This is actually how I operate on a daily basis, but is even more pronounced on vacation when food is meant to be enjoyed and indulgent). So when my mom arranged our week-long stay in East Hampton back in April, you can bet that I went right to work researching all the hot spots and local eateries.

Being a huge Ina Garten, I felt like I'd already been to East Hampton a million times before, having seen almost every episode of her show. The cheese shop owner would greet me by name, and my favorite loaf of bread would be waiting for me at the bakery--and everything would be for free, just like it is for Ina! Well, things certainly do not come free in the Hamptons--far from it--but I was most charmed by all of the local shops and farms.

In between over-the-top meals at The Palm and Nick & Toni's, we did need somewhat of a breather. But that didn't mean we had to skimp on flavor. After a trip to the farmer's market in Amagansett, I decided to make a simple pasta primavera with all of the fresh vegetables. Served with some nice crusty bread, it made a delicious, fresh meal, just light enough to leave room for dessert. All of the restaurants we tried throughout the week were spectacular--impeccable service and food--but nothing made me feel more like quintessential Ina than cooking with local ingredients from my fabulous farmer friends. And just like Ina always says, I couldn't help but say, "Now, how easy is that?"

Pasta Primavera
Serves 4-5


Ingredients:
1 lb dried pasta (I used spaghetti, but any kind will do)
3 tbs olive oil
2 garlic cloves, minced
1/2 cup chopped yellow onion
1 zucchini, cut into 1-inch cubes
1 yellow zucchini or summer squash, cut into 1-inch cubes
1 red bell pepper, diced
1 medium eggplant, cut into 1-inch cubes
1/3 cup dry white wine
2 tbs rosemary, finely chopped
juice of 1 lemon
1/3 cup parmesan cheese
salt and pepper

1. Bring a large pot of salted water to a boil. Add the pasta and cook until al dente.
2. Meanwhile, heat the olive oil in a large skillet over medium heat. Add the garlic and onion and saute 1-2 minutes, until fragrant.
3. Add the vegetables to the skillet and toss to coat in the oil, season with salt and pepper. Allow the veggies to cook and brown a bit, about 5-6 minutes.
4. Add the rosemary and white wine. Cook the vegetables until the wine reduces by half. Season the sauce with salt and pepper as needed.
5. When the sauce is done, pour into a large serving platter on top of the cooked pasta. Drizzle with the lemon juice and sprinkle with parmesan cheese. Toss to combine and serve with fresh, crusty bread.

Pasta primavera à la East Hampton!

Insane chocolate from The Palm that we had to order for takeout after having devoured it in the restaurant. 
Delicious fig chutney, rosemary crackers and triple crème brie from Ina's (and now my) favorite shop, Loaves & Fishes.

Tuesday, July 19, 2011

Familar Food: Making Pizza

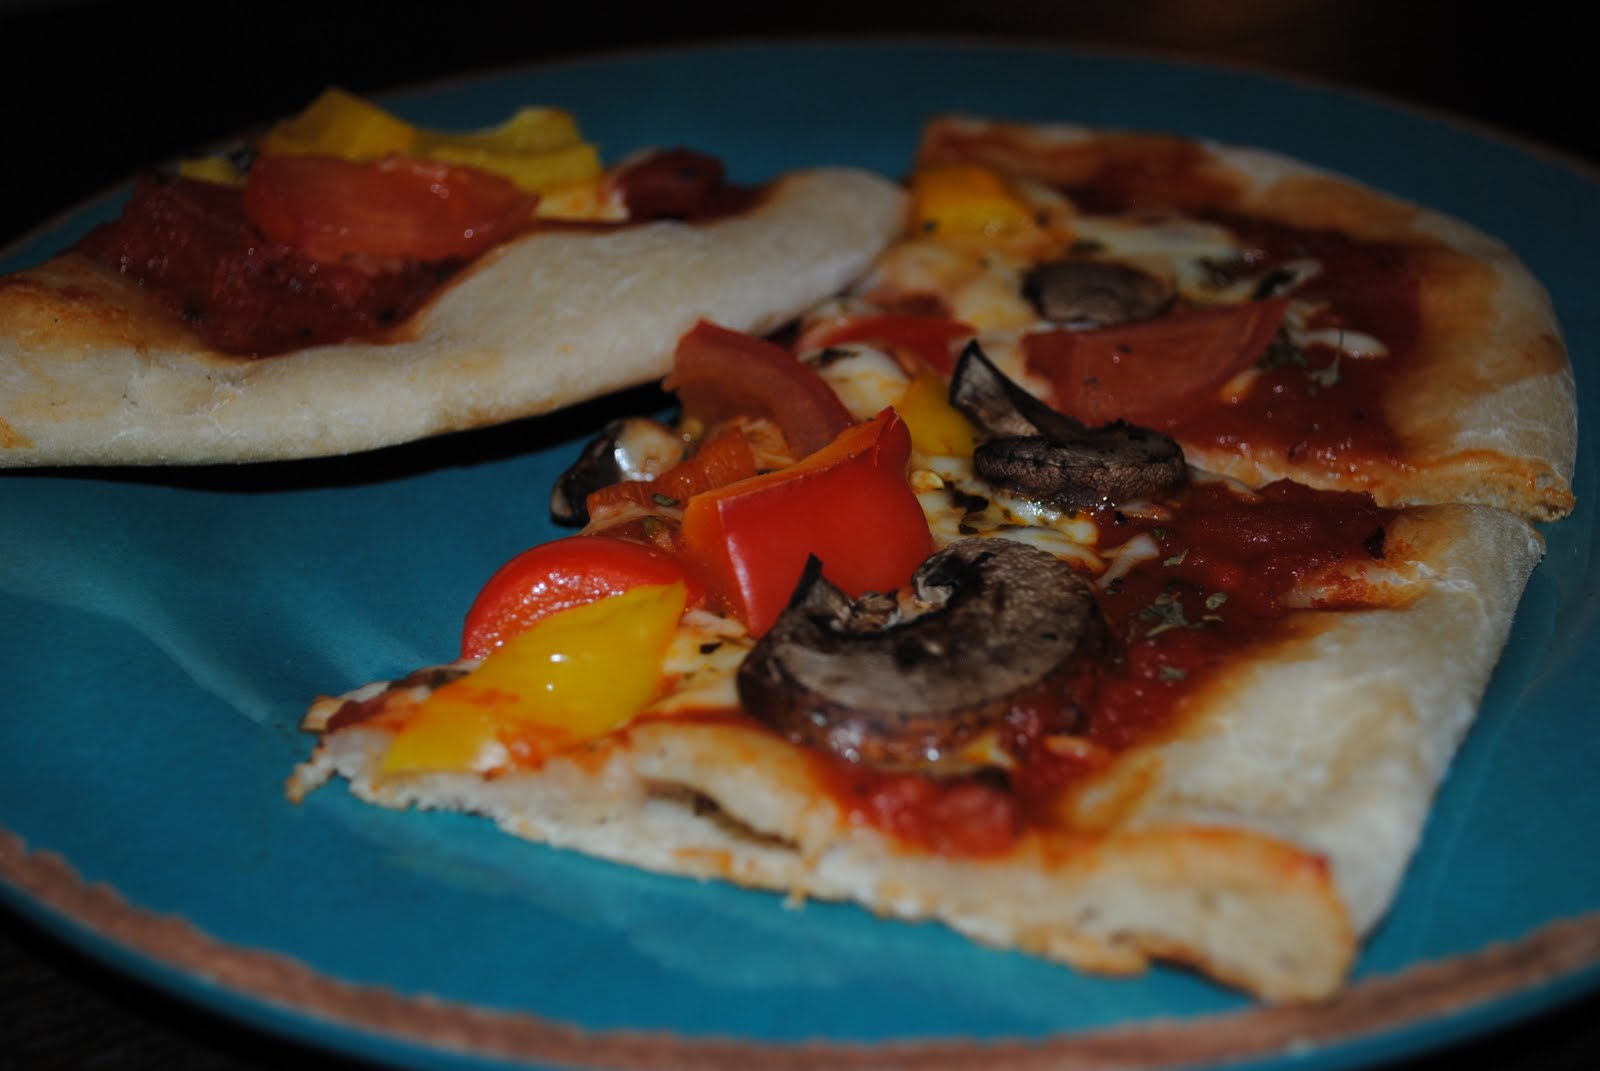
Pizza is a Friday night tradition at home. Even though the pizza selection in Westborough, MA is quite limited, I always looked forward to this ritual as the true beginning of the weekend. As I grew up and my palette matured, I started to realize that pizza in Westborough really is not good. At all. To keep up with our Friday ritual without sacrificing taste, I started to make pizzas for my family. The best part about this was that I could easily customize our pizzas to fit the varied (and limited) taste buds of everyone--peppers and mushrooms for me, broccoli and ricotta for mom, plain ol' cheese for Emma. Pizza Fridays made for a stress-free, yet tasty (and much better than Papa Gino's) kick-off to the weekend.

Now that I no longer live at home, Emma has taken on the role of pizza-master. While both delicious, we each have our signature pies (mine has a crispier crust; Emma's a little softer). But just because I live in Pizza Paradise, also known as New York City, doesn't mean I can't carry on the family tradition here.

Luckily, homemade pizza is a cheap and easy solution to cooking with friends. Everyone can chip in with favorite toppings, and everyone can take on a task: rolling out the dough, chopping the veggies, sprinkling the cheese. It's a fun and nostalgic way to get those friends in the kitchen who don't usually cook for themselves. So that's just what me and a few of my friends did this Monday night. Albeit, it wasn't a Friday night and it wasn't with my family, but sharing laughs and good food with friends made the next 4 days until Friday seem just a little less threatening.

Veggin' it up!

Teamwork

Classic cheese pizza with fresh tomatoes, red and yellow peppers, and mushrooms

Feta cheese and pesto pizza with sliced tomatoes and mushrooms--the favorite!

Tuesday, July 12, 2011

You Grill, Girl!

Who ever said that girls can't grill? My women's studies classes in college taught me well that gender is not defined by biology, but by the societal and structural demands and expectations placed on the so-called genders. As a feminist who loves a good burger, you better believe no societal expectations were getting in the way of me learning how to man the grill.

I have to admit, it was a little scary the first time my dad taught me how to light it. It probably didn't help that my mom was fretting through the window, waiting for the flames to blow up in my face. Like any cooking technique, it's taken me some time to figure out all of its intricacies--how hot to heat it up, or how to know when your burger is done. But there are a few female-gendered qualities that just might be a little more helpful on the grill. (Boys, listen up. Take a lesson from these qualities not only at the grill, but also in real life...)

1. Patience is extremely important on the grill. Flipping your burgers over and over again won't make them cook any faster. Let the meat/veggies/etc sit for a good few minutes to get that nice char on one side before flipping.

2. Be gentle with your food, especially burgers and fish. Pressing the burgers into the grill only causes all the tasty juices to drip out. Make sure the grill is lightly oiled or sprayed before placing fish on the grate--if it sticks, it will crumble apart when you try to move it.

3. Organization A little planning can get you a long way in the kitchen, whether cooking inside or out. Before you throw all your food on the grill at once, make sure you know the cooking times for each item. Also, the more you crowd the grill, the longer everything will take to cook. Keep food evenly spaced for accurate cooking times.

So go forth women, and show that grill what you're made of!

Grilled Vegetable Skewers
Makes 6-7 skewers


Ingredients:
1 pint cherry tomatoes
1 summer squash
1 zucchini
1 tbs finely chopped fresh rosemary
1 tbs finely chopped fresh thyme
1 garlic clove, minced
1 tsp kosher salt
1/2 tsp black pepper
1/4 cup balsamic vinegar
1/3 cup olive oil

1. Cut the squash and zucchini into 3/4-inch cubes, so they're about the same time as the cherry tomatoes. Place in a boll with tomatoes.
2. In a small bowl, whisk together balsamic vinegar, olive oil, herbs, garlic, salt and pepper. Pour the marinade over the vegetables and stir to coat. Refrigerate for 20 minutes to allow the vegetables to absorb the flavors.
3. Assemble the skewers as desired.
4. Over a medium grill that's been lightly brushed with olive oil or sprayed with cooking spray, place the skewers so they run perpendicular to the grate. Flip every 2-3 minutes, so that all sides are nicely charred and cooked through.
Cheddar burgers and vegetable skewers

Grilled sweet potato fries

S'mores! (these were deceivingly not prepared on the grill)