Thursday, December 15, 2011

That Time of Year

There's no denying that the Christmas season is one of the best - if not the best - time of the year. Christmas carols, The Nutcracker, decorating the tree. Something about this season just feels magical. Although my Santa days are sadly long gone, these traditions help bring back those feelings of excitement and anticipation that seemed to last an eternity as a kid. Just because I'm at the age where Santacon is more appropriate than sitting on Santa's lap at the mall, doesn't mean I can't still indulge myself in other kid-friendly Christmas activities. 

Now in its second year, my friends' gingerbread house making/Love Actually viewing party was even better than the first: more friends, more food, and even some blood! (Wouldn't be a gingerbread house party without someone cutting themselves opening a tube of frosting, right Steph?) As fun as gingerbread decorating is, it can also be a little frustrating. The walls fall down, gumdrops slide off the roof, and Frosty just refuses to stand upright! Thankfully we had some delicious mulled wine and treats to take the edge off. In addition to some deliciously festive eggnog cheesecake bites and super decadent chocolate chip loaf with caramel drizzle, I contributed something a bit more savory: stuffed mushrooms. For some unexplainable reason, I had a strong urge to make stuffed mushrooms. They've never been a tradition at my family Christmases (Ga-ga actually has a very strong aversion to mushrooms), but something about them just seems fun and festive to me - maybe because they're like little presents filled with yummy surprises? Anyways, it was a wonderful little fete filled with wine and Colin Firth-ogling. You can never be too old for Christmas; you just find ways to make your favorite traditions as a kid a little more grown up. 


Stuffed Mushrooms (adapted from Smitten Kitchen)
Makes about 24 with leftover stuffing which I used as a pasta sauce and with stuffed chicken - see pictures below!


Ingredients:
8 bacon slices
1 cup chopped onion (about 1 small-medium onion)
1 10-oz package frozen, chopped spinach, thawed and squeezed dry
4 oz feta cheese, crumbled
4 oz cream cheese at room temperature
1/4 tsp crushed red pepper
Salt and pepper
3 packages white button mushrooms, stems removed


1. Preheat oven to 375 degrees. Cook bacon in a large skillet until crisp, about 8 minutes. Transfer to paper towels to drain. Coarsely chop bacon. Reserve bacon fat in the pan.
2. Heat 2 tsp reserved bacon fat in skillet over medium heat. Add chopped onion and saute until tender. Transfer to medium bowl and cool. Mix in bacon, spinach, feta, cream cheese and crushed red pepper. Season filling to taste with salt and pepper. 
3. Line a large rimmed baking sheet with foil. Toss mushrooms with remaining bacon fat in a large bowl to coat. Sprinkle mushrooms with salt and pepper. Place mushrooms, rounded side down, in single layer on the baking sheet. Bake mushrooms until centers fill with liquid, about 25 minutes. Turn mushrooms over. Bake mushrooms until liquid evaporates, about 20 minutes more. 
4. Spoon 1 heaping tsp filling into each mushroom cavity. Bake mushrooms at 375 degrees until heated through, about 10 minutes. Serve warm. 


Leftover stuffed mushroom filling makes a great creamy pasta sauce!

Or a savory filling for stuffed chicken breasts!

Monday, December 5, 2011

Eggcellent Spinach, Mushroom & Goat Cheese Frittata

One of my favorite dishes that my mom makes is her quiche. Quiche was a staple in my mom's weekly round-up of dinner recipes. Most frequently she'd make broccoli and cheddar quiche, which was delicious and suited to the picky taste buds of my younger siblings. But my favorite was the bacon and Jarlsberg quiche; the more pungent flavor of the Swiss cheese and the saltiness of the bacon were most satisfying to my "refined" palate as a kid.

Quiche always seemed like such an elegant dish to me when I was younger. I remember my French teacher used to ooh and ah about Quiche Lorraine, and I would envision myself enjoying the savory bite as I sipped un cafe au lait along the Seine (in fact, this is still a dream of mine...). Something about the indulgent ingredients - creamy cheese, fatty bacon, buttery crust - made me think quiche was a dish reserved for experienced cooks...

And it could be if you have the time and patience to make your own pie crust. But since moving to NYC, quiche has become one of my go-to dishes for entertaining or potlucks. Okay, I cheat and use pre-made pie crust, but it still tastes delicious and saves me so much time. From there, it's just a matter of mixing your eggs and preferred cheeses/veggies/meats et voila... quiche straight from Paris!

Now you're probably expecting a quiche recipe, when in fact I'm going to give you a recipe for a frittata. A frittata is like an Italian quiche, sans crust; therefore making it slightly healthier (depending on what cheese and other fatty goodness you put inside). In an effort to balance out the obscene amount of gingerbread and cookies I'll be eating in the coming weeks, I decided to fare on the lighter side by amping up the vegetables and opting for a lighter cheese (i.e. goat cheese). The great thing about this frittata (or quiche for that matter) is that it tastes great hot, cold or at room temperature, and makes for a delicious breakfast, lunch or dinner. Even though I cheat on the crust (or avoid it all together as I did here), I can still feel like a chic Parisian while I eat my frittata from my desk in New York. Bon appetit!


Spinach, Mushroom & Goat Cheese Frittata
makes 5-6 servings
Ingredients:
2 tbsp butter
1 small onion, chopped
1 garlic clove, minced
1 1/2 cups baby bella mushrooms, chopped
3 cups fresh baby spinach
Pinch of red pepper flakes
Salt & pepper
7 eggs, beaten
4 oz goat cheese

1. Melt butter in a nonstick, oven-safe skillet over medium-high heat. Add onion, garlic and mushroom. Sprinkle with a pinch of red pepper flakes, and season with salt and pepper. Stir to coat in butter and cook until onions become translucent, about 6 minutes.
2. Add the spinach to the pan. Stir until the spinach wilts down.
3. Add the eggs to the skillet. Continue to cook over medium-high heat, swirling around the eggs with a rubber spatula.
4. When the eggs start to set and the sides come together, sprinkle the goat cheese on top. Place the pan under the broiler until the eggs are fluffy and slightly golden, and the cheese is melted - about 4 minutes.
5. Allow frittata to cool slightly before cutting into slices. Serve warm, cold or a room temperature.

Thursday, December 1, 2011

A Very Gaga Thanksgiving

While some of you may have turned on your TV to catch "A Very Gaga Thanksgiving" this year, we had a very Gaga Thanksgiving in the flesh! As much I would have enjoyed eating our Thanksgiving meal to the melody of "Bad Romance"as we all incubated in large eggs, I'm talking about the first and original Gaga, not Lady Gaga... our grandma! Me being the oldest grandchild and genius baby that I was, came up with the nickname Gaga, and 23 years later, I can safely say I was a fan of Gaga before anyone else.

Usually, my family spends Thanksgiving at Gaga's house in Westchester, NY with our cousins, aunts and uncles, but this year was a much more intimate affair at our house in Westborough, MA with just my direct family and, of course, Gaga. Though we knew it would be small, that was no excuse to skimp on the food. No, no. Not when a Costanzo is in the house! (Costanzo is Gaga's last name). In case you couldn't tell, Costanzo is obviously Italian, so any family get together - especially Thanksgiving - is going to involve a lot of food... obviously.

We all joked about the different food theories between my mom's family (Italian) and my dad's (Irish). In the Costanzo house, there can never be enough food, which is probably why we had six desserts for the six of us on Thanksgiving! For the Colberts, what you have is always more than enough. (To give you an idea of what I mean, my dad's mother used to feed a family of seven children with ONE can of tuna!!!) And even though my dad's family is full of great cooks, I'm gonna have to go with the Costanzos on this one. You really can never have enough good food.

But regardless of how big or small that turkey is, or how many pies you make, the food is just a vehicle for bringing us all together. Making jokes, laughing together, and sharing memories of loved ones. Now that I live on my own, not so close to my family, I've really come to appreciate the time that we do spend together. And the fact that my family lives loves to eat, makes these times even better.

The superstar herself... Gaga! 
Michael and Emma hard at work icing cookies!
Baked brie en croute with walnuts and cinnamon
Haricots verts with roasted shallots and fennel
Dad and his pride and joy
More sides! Sweet potato pie, roasted butternut squash, and stuffing...mmm

Thursday, November 10, 2011

Thrifty Kitchen

My family likes to make fun of Ga-ga (our grandma, NOT to be confused with Lady Gaga!) for her inability to let anything go to waste. She freezes milk, which she later defrosts in the microwave. You'll find a half-eaten sandwich and half a glass of wine in the fridge, because you never know when that afternoon craving for a snack and some vino will strike! She even asks to take home the extra free bread at restaurants, which she'll then freeze and find some use for in the future.

As much as we like to kid about her Depression-era tendencies, I've actually come to appreciate her thrift in the kitchen now that I'm living on a Depression-era budget. While I'm not freezing my milk or asking for the scraps at restaurants (yet) I do try to be as resourceful as possible when it comes to cooking and food shopping. Now that the cost of food is coming out of my wallet and not from a dining hall or from home, it kills me to throw out spoiled veggies or leftovers knowing that it's my money going straight to the trash.

So when I prepared a batch of pumpkin seed-cilantro pesto earlier this week, I had to put my thrifting skills to work and find ways to get the most out of my pesto without it going to waste by the weekend. The recipe is from the latest issue of Bon Appetit in which it is served atop pan-seared salmon. After three nights in a row of salmon with pumpkin seed-cilantro pesto it was time to switch it up. But what to do with the extra pesto? Well, I happened to have a few brussels sprouts in the fridge, some chicken in the freezer, and pasta in the pantry. So rather than use the pesto as a condiment, why not use it as a sauce for a pasta dish?

My pasta creation turned out to be a great success. The pesto nicely accompanied the nutty whole wheat pasta and hearty brussels sprouts. You'd never know that this dinner was pulled together with the scraps from my fridge and pantry. Being thrifty in the kitchen can push you to get more creative; and you'll be pleasantly surprised by the results (as will your wallet). I think this is a meal Ga-ga would be proud of :)

Pan-Seared Salmon with Pumpkin Seed-Cilantro Pesto, adapted from Bon Appetit
makes 3 servings plus extra pesto for the following recipe
Ingredients:
2 1/2 tsp plus 1/4 cup extra virgin olive oil, divided
1/2 cup shelled pumpkin seeds (pepitas)
1/2 cup cilantro leaves and stems
1 garlic clove, coarsely chopped
1 tbs fresh lime juice (about 2 limes)
1/4 cup water
Kosher salt and black pepper
3 salmon filets

1. Heat 1 1/2 tsp oil in nonstick skillet over medium-high heat. Add the pumpkin seeds and saute until they begin to brown and pop (about 2 minutes). Transfer seeds to paper towels to drain and let cool. Reserve oil in the skillet.
2. Pulse the pumpkin seeds, cilantro and garlic in a food processor until coarsely chopped. With the machine still running, gradually add the lime juice, 1/4 cup oil and water. Season with salt and pepper to taste.
3. Add remaining teaspoon of oil of the skillet over medium heat. Season salmon filets with salt and pepper. Add salmon to the skillet and cook until just opaque in the center, about 3-4 minutes each side. Serve salmon with pesto.

Pasta with Brussels Sprouts, Chicken & Pesto
serves 1
Ingredients:
1 cup brussels sprouts, quartered
Olive oil
Kosher salt & pepper
1 boneless, skinless chicken breast, cut into small pieces
1/2 cup dried whole wheat penne (or whatever pasta desired)
1/2 cup reserved pasta water (if needed)
Leftover pesto from above
Freshly grated Parmesan cheese, for garnish

1. Preheat oven to 425 degrees. Place brussels sprouts on baking sheet. Toss with a glug of olive oil, and a sprinkle of salt and pepper. Roast until the sprouts are tender and begin to brown, about 20 minutes.
2. Meanwhile, bring a small pot of water to a boil. Season the boiling water with salt and add the pasta. Cook until al dente, about 8-9 minutes.
3. Heat about a teaspoon of olive oil in another skillet over medium heat. Add the chicken and season with salt and pepper. Toss until all sides begin to brown.
4. Remove the skillet from the heat. Add the cooked brussels sprouts and pasta to the pan. Toss with the remaining pesto. Thin out the sauce with some reserved pasta water if needed. Top with freshly grated Parmesan cheese and serve hot.


Tuesday, November 1, 2011

Celebrate Good Food, C'mon!

For me, food is the answer to all of life's ups and downs: break ups, hangovers, birthdays, new jobs. There is no better way to feel better or to celebrate than through food. So upon starting my new job at Benchmarc Restaurants, you can bet I toasted myself with a delicious, gourmet meal.

On the eve before my new adventure, I was craving something elegant yet hearty. With some butternut squash in the fridge and arborio rice in my pantry, I decided that a butternut squash risotto would be the perfect self-celebratory dinner. After making a quick trip down to Westside Market to pick up a few other ingredients - vegetable stock, sage, and of course, white wine (for cooking and consuming) - I was ready to go.

This wasn't the first time I attempted butternut squash risotto. Unfortunately my first try last year at Christmas was a bit of a flop. First, the squash was already spoiled by the time I went to use it, so I was forced to improvise. Being my first time ever making risotto, I was definitely not experienced enough to do so. What I ended up with was a grayish, purple risotto (from red wine) and grains that were still quite starchy and chewy. My first risotto was as sad as a lump of coal on Christmas morning. But thankfully, I lived and I learned...

And this second attempt at butternut squash risotto certainly was something to celebrate! So creamy and hearty, with a touch of sweetness from the squash and vanilla bean, and a lovely earthiness from the sage. The dish was exactly what I had been craving and was luxurious enough to feel like I was "treating" myself even while I ate in my sweatpants and slippers.

Butternut Squash and Vanilla Risotto (adapted from Giada De Laurentiis)
serves 4-6

Ingredients:
4 cups vegetable stock
1 vanilla bean
3 cups peeled and cubed butternut squash (I buy the pre-cut squash from Trader Joe's)
2 tbs butter, plus 1 tbs
1 onion, finely chopped
1 1/2 cups arborio rice
1/2 cup dry white wine
1/2 cup freshly grated Parmesan cheese
1/2 tsp salt
8-10 sage leaves, roughly chopped

1. In a medium saucepan, heat stock over medium-high heat. Cut the vanilla bean in half lengthwise and scrape out the seeds. Add the seeds and pod to the pot.
2. When the broth comes to a simmer, add the squash and cook until tender, about 10 minutes. Using a slotted spoon, move the squash to a side dish. Cover the broth and keep warm over low heat.
3.  In a large, heavy saucepan melt 2 tablespoons of the butter. Add the onion and saute until tender, about 3-4 minutes. Add the rice and stir to coat with the butter. Add the wine and simmer until it has almost evaporated, about 3 minutes.
4. Add 1/2 cup of the hot broth to the rice and stir until almost completely absorbed, about  2 minutes. Continue cooking the rice, adding 1/2 cup of broth at a time, stirring constantly and allowing the liquid to be absorbed in between additions. The rice should be creamy and tender to the bite when finished cooking. (If you're starting to run low on the broth and the rice is still too firm, just heat up more broth or water until the rice is cooked).
5. When the rice is cooked, remove from the heat and discard the vanilla bean pod. Gently stir in the Parmesan cheese, sage, salt and remaining tablespoon of butter. Serve immediately.

Wednesday, October 19, 2011

Apples to Apples

Apple picking is one of my favorite fall festivities. The smell of cinnamon-y cider donuts, hay rides, and the crisp, chill air are symbols of quintessential autumn. Even at 23 I still get the same thrill of plucking the perfect apple as I did when I was 10. Something about this wholesome activity makes me nostalgic for our family visits to Arnold's Orchard in Westborough, MA where the apples were plenty and the stinky rabbits in the mini petting zoo even more so.

This past weekend marked our group's second annual trip to Outhouse Orchards in Croton Falls, NY. After scrambling to catch the train due to a much needed Starbucks run, we were on our merry way out of Manhattan to the "country". Just over an hour outside the city, it was quite the cultural adjustment for us Manhattanites. Only three cabs in service for the whole town? Impossible! But yes, after a 30 minute wait for one of the three cabs in all of Croton Falls we had FINALLY made it to Outhouse Orchards!

The sweet, sugary smell of cider donuts hit us as soon as we stepped out of the cab. Heaven. Unfortunately, the orchard was entirely picked out of apples, but lucky for us, there was another orchard right across the street that was still ripe for pickin'.

It was quite the struggle at first. We searched high and low for apples, but to no avail. After a frustrating start to the day we made friends with Alessando, an adorable 3 or 4 year old boy who pointed us to where we could find more apples and lent us his picker to reach those at the tops of the trees. He even assisted in picking a few apples for us! (Not knowing if he actually picked these or just took some dirty ones off the ground, we had to toss 'em.) In the end, we wound up with a full satchel of apples, while although on the smaller side, were still beautiful and perfect for cooking... Because really, who actually eats all those apples anyway? Everyone knows the only reason you go apple picking is to make unhealthy things out of them! Apple crisp, apple pie - bring on the carbs and buttah!

So this made the perfect opportunity for an apple-themed potluck. But this was no ordinary apple potluck. No, we had a bounty of unexpected sweet and savory dishes. The menu included:

  • Curried Apple Soup
  • Baked Brie with Apples and Walnuts
  • Butternut Squash and Apple Gratin
  • Apple, Onion and Goat Cheese Tart
  • Apple and Raisin Bread Pudding
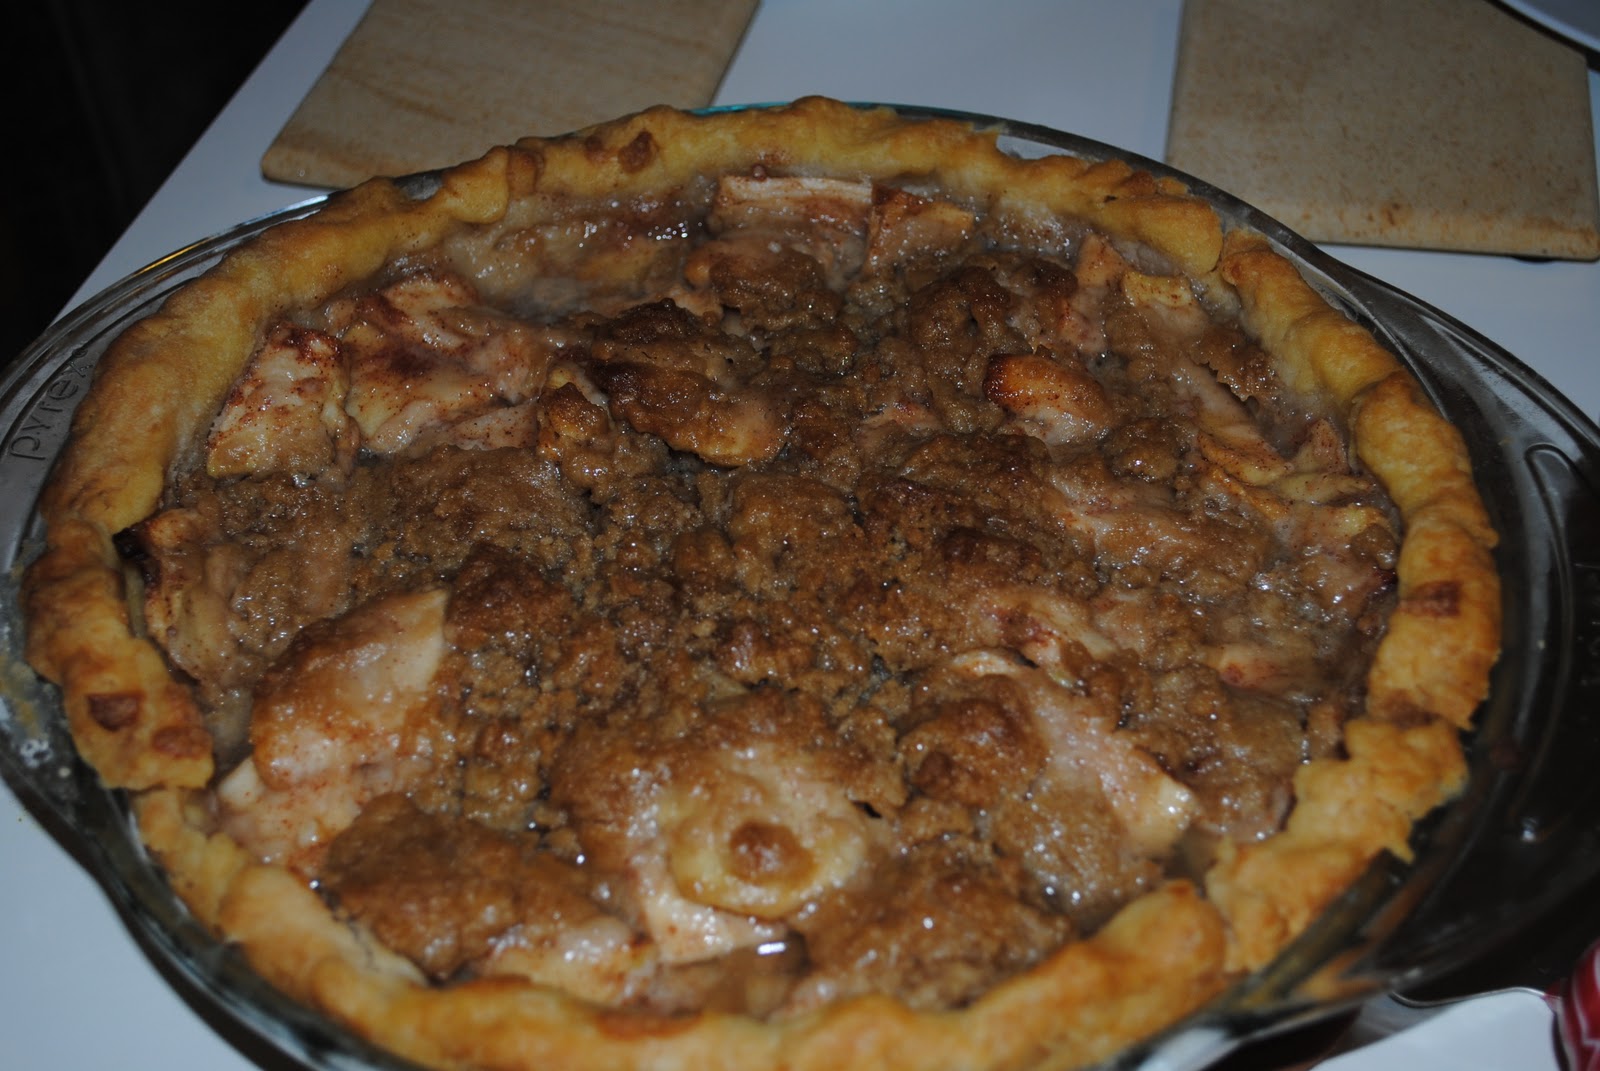
  • Apple Pie with Crumble Topping (because you just can't go apple picking without making an apple pie!!)
Apple picking may be an activity that brings me back to my childhood, but this potluck was a real grown-up affair. Every dish was so delicious and perfectly balanced with the slightest apple taste, that I couldn't resist a second serving. Leaving happy and with my pants unbuttoned, I was already excited to continue this new fall tradition next year.

Apple, Onion and Goat Cheese Tart
serves a crowd, or 6 hungry girls 

Ingredients:
1 package puff pastry dough, thawed
2 tbsp olive oil
2 small-medium apples, cored and thinly sliced
4 onions, halved and thinly sliced
1/2 cup crumbled goat cheese
2 tsp dried thyme

1. Heat olive oil over medium heat in a large, heavy-bottomed pot. 
2. Add the onion and apples. Stir to coat in the olive oil. Cook slowly until the onions and apples begin to caramelize and become very soft, about 25-30 minutes. Stir occasionally to evenly distribute heat. 
3. Meanwhile, place puff pastry dough on a baking sheet lined with parchment paper. Gently prick dough. Bake at 400 degrees for 10 minutes.
4. When the onion and apples are done, gently spread on top of the pre-cooked pastry dough. Sprinkle with goat cheese and dried thyme.
5. Return the tart to the oven at 400 degrees and continue cooking until cheese begins to melt and the tart turns golden brown, about 10 minutes. 
6. Allow the tart to cool slightly before cutting into pieces. Serve warm.

Apple, Onion & Goat Cheese Tart
Baked Brie
Curried Apple Soup
Apple Pie with Crumble Topping
Apple Bread Pudding
We love apples!!!

Sunday, October 9, 2011

A Belieber in Pumpkin

I'm going to let you in on a little secret. I'm having a love affair...

With pumpkin! I've had a pumpkin fetish ever since the pumpkin spice latte was introduced at Starbucks years ago. I do think the pumpkin craze is a bit much now, a little too mainstream. But I'd like to think I was one of the original pumpkin enthusiasts, before it became so in vogue.

But so what if pumpkin is more of a "rom-com" than an edgy, indie flick. I've always preferred my movies cheesy and my music poppy. Maybe pumpkin is the Justin Bieber of food right now, but that's not going to stop my obsession (with pumpkin I mean, although I do have quite the case of Bieber Fever). Knock it all you want, but it's darn good, and you can't deny that you don't love it too (again, I'm talking about pumpkin here, but also applies to the Biebs).

We all love pumpkin for its sweet, nutty flavor; but the reason it's such a beloved ingredient is for what it represents: family traditions, holidays, gathering together with loved ones. Surprisingly pumpkin pie was never a staple at our Thanksgiving table, but the symbol of what it represents makes me nostalgic for holidays past as a kid.

While I love your standard pumpkin dishes - pumpkin pie, pumpkin bread - I'm interested in using it in new and expected ways. So when I came across this recipe from Serious Eats for pumpkin turkey chili, I just had to try it. Pumpkin and chili, how much more autumn and hearty can you get? It seemed like the perfect combination...and trust me, it was! The pumpkin flavor was very subtle, but added a nice warmth and spice to the chili. It was the perfect one-pot meal to make on a lazy Sunday afternoon. This pumpkin turkey chili gave a more hipster edge to an otherwise Bieber-esque ingredient.

Pumpkin Turkey Chili
Makes 5-6  servings


Ingredients:
1 tbs vegetable oil
1 cup chopped onion
1/2 red bell pepper, chopped
1/2 yellow bell pepper, chopped
1 can (4 oz) chopped green chiles
1 garlic clove, minced
1 lb ground turkey
1 can (14.5 oz) diced tomatoes
1 can (14.5 oz) red kidney beans
1 can (14.5 oz) pumpkin puree
1 1/2 tbs chili powder
1/2 tbs cumin
3/4 tsp salt
1/2 tsp black pepper
Cayenne pepper to taste (about 3-4 shakes)
1/4 fresh cilantro, chopped
Shredded cheddar cheese

1. Heat oil in large pot over medium heat.
2. Saute onion, pepper, green chiles and garlic until tender - about 10 minutes.
3. Make room in the center of the pot. Add the turkey and brown, breaking up with the back of a spoon.
4. Stir in tomatoes, beans and pumpkin. Add chili powder, cumin, cayenne, salt and pepper.
5. Reduce heat and simmer at least 20 minutes. Stir in fresh cilantro. Serve with shredded cheddar cheese.

The perfect workweek lunch - healthy, hearty and delicious!